Valentine Cake Ideas
Valentine Cake Ideas. Valentine cake recipes and easy cake decorating tips. Gluten free and dairy free options. Valentine Day cupcakes, a great personalised homemade valentine gift for the one you love.
Whether you need a Valentine gift for him or her, if they love cake they will adore this romantic and thoughtful homemade Valentine gift.
Valentine cake ideas
Whether you chose one of our recipes or a favourite recipe of your own. Use our easy cake decorating tips and designs to make these cute heart shaped Valentine cakes that are bound to win you lots of brownie points.
Heart shaped
Simply make individual cup cakes and cut out the shapes using a heart shaped cookie cutter.
Or cut out heart shapes (carefully!) freehand using a sharp knife to create individual heart cupcakes or one BIG heart from one large cake.
This will be easier if you pop your cakes in the fridge to firm up before cutting.
Personalize your homemade Valentine Day gift
Personalize your cake(s) with our easy cake decorating tips and designs. We offer different Valentine cake ideas but you know your loved one best so go mad and use our designs to inspire you to make something unique for them.
Make them a Valentine cake they will never forget.
Recipe options - gluten free, dairy free and “normal”
Each recipe comes in options for gluten freeGF,dairy free DFand “normal”.
As our website name suggests our recipes are fundamentally wheat and gluten free but we do offer other options for these special Valentine cake ideas.
Our main aim as always is to provide recipes and tips to help you make food that everyone can enjoy.
Whether you have a special food requirement or not, the key is great food made for sharing. Pick the recipe that suits you and your loved one best whatever their requirements.
Valentine Cake Ideas
Recipes
Skip to our decorating tips and designs
Chocolate cake recipe
This chocolate cake recipe is easy to follow.
And is one of me favourites recipes for celebration cakes as everyone seems to love chocolate cake.
Chocolate cake - ingredients
5 oz/150g butter or dairy and lactose free vegetable spreadDF(my favourite is sunflower spread). Plus extra for preparing baking tray.
5 oz/150g sugar
3 Eggs
5 oz/150g self raising gluten free flourGF, or 5oz/150g all-purpose flour/plain flour plus 2 teaspoons baking powder. Sieved.
1 1/4 ozs (30g) cocoa powder. Sieved.
a little milk or non-dairyDF alternative such as almond or soy milk or even cold tea. Particularly required if you are using gluten free flour.
Chocolate cake - instructions
1. Pre heat oven 350⁰F, 180⁰C (160⁰C fan oven).
2. If making one 6” round cake, line cake tin with baking parchment or grease bottom and sides of cake tin with butter/vegetable spreadDF.
If you are making small individual cakes either grease bottom and sides of each bun with butter/vegetable spreadDF or place cupcake cases into each bun.
3. Mix the sugar and butter/vegetable spreadDFwell until lightens in colour. Using butter at room temperature will be easier to mix.
4. Add 2 eggs, half the sieved flour (and baking powder) mixture and all the sieved cocoa powder to the sugar/butter/vegetable spread mixture and mix well until fully combined. Don’t worry if the mixture separates just move onto the next step.
5. Add the remaining egg and flour/baking powder mixture and mix well making sure all the ingredients are well combined.
6. If necessary add small quantity of milk or non-dairyDF alternative as required to make the mixture sloppy but not so much that it starts to separate. If it does separate simply add a little bit more flour until it comes together again.
7. Pour mixture into tin/tins and place in the oven.
8. Bake for 40-45 minutes for one cake, 15-20 minutes if you are making small cakes. Test the cake(s) with a cake tester. The cake is ready when the top is firm to the touch and the tester comes out clean. The cooking time can vary for different ovens.
Let the cake(s) cool in the tin(s) for at least 15 minutes then carefully remove and cool on a cooling tray.
Sponge cake recipe
Sponge cake is one of those traditional cakes that never seems to fall out of favour.
This easy recipe makes the tastiest sponge cake.
Sponge cake - ingredients
5 oz/150g butter or dairy and lactose free vegetable spreadDF(my favourite is sunflower spread). Plus extra for preparing baking tray.
5 oz/150g sugar
3 Eggs
5 oz/150g self raising gluten free flourGF, or 5oz/150g all-purpose flour/plain flour plus 2 teaspoons baking powder. Sieved.
Sponge cake - instructions
1. Pre heat oven 350⁰F, 180⁰C (160⁰C fan oven).
2. If making one 6” round cake, line cake tin with baking parchment or grease bottom and sides of cake tin with butter/vegetable spreadDF.
If you are making small individual cakes either grease bottom and sides of each bun with butter/vegetable spreadDF spread or place cupcake cases into each bun.
3. Mix the sugar and butter/vegetable spreadDF well until lightens in colour. Using butter at room temperature will be easier to mix.
4. Add 2 eggs and half the sieved flour (and baking powder) mixture to the sugar/butter/vegetable spread mixture and mix well until fully combined. Don’t worry if the mixture separates just move onto the next step.
5. Add the remaining egg and flour/baking powder mixture and mix well making sure all the ingredients are well combined.
6. Pour mixture into tin/tins and place in the oven.
7. Bake for 40-45 minutes for one cake, 15-20 minutes if you are making small cakes. Test the cake(s) with a cake tester. The cake is ready when the top is firm to the touch and the tester comes out clean. The cooking time can vary for different ovens.
Let the cake(s) cool in the tin(s) for at least 15 minutes then carefully remove and cool on a cooling tray.
Lemon drizzle cake recipe
This recipe makes super moist lemon drizzle cake.
Made with fresh lemons it zings with natural lemon flavour.
Lemon cake - ingredients
5 oz/150g butter or dairy and lactose free vegetable spreadDF(my favourite is sunflower spread). Plus extra for preparing baking tray.
5 oz/150g sugar
3 Eggs
5 oz/150g self raising gluten free flourGF, or 5oz/150g all-purpose flour/plain flour plus 2 teaspoons baking powder. Sieved.
2 lemons - rind and juice
Lemon cake - instructions
1. Pre heat oven 350⁰F, 180⁰C (160⁰C fan oven).
2. If making one 6” round cake, line cake tin with baking parchment or grease bottom and sides of cake tin with butter/vegetable spreadDF.
If you are making small individual cakes either grease bottom and sides of each bun with butter/vegetable spreadDF or place cupcake cases into each bun.
3. Mix the sugar and butter/vegetable spreadDF well until lightens in colour. Using butter at room temperature will be easier to mix.
4. Add 2 eggs, half the sieved flour (and baking powder) mixture and the lemon rind to the sugar/butter/vegetable spread mixture and mix well until fully combined. Don’t worry if the mixture separates just move onto the next step.
5. Add the remaining egg, flour/baking powder mixture and lemon juice and mix well making sure all the ingredients are well combined.
If the mixture has separated simply add a little bit more flour until it comes together again.
6. Pour mixture into tin/tins and place in the oven.
7. Bake for 40-45 minutes for one cake, 15-20 minutes if you are making small cakes. Test the cake(s) with a cake tester. The cake is ready when the top is firm to the touch and the tester comes out clean. The cooking time can vary for different ovens.
Let the cake(s) cool in the tin(s) for at least 15 minutes then carefully remove and cool on a cooling tray.
Valentine Cake Ideas
Decorating designs
Chocolate Valentine cake decorating design
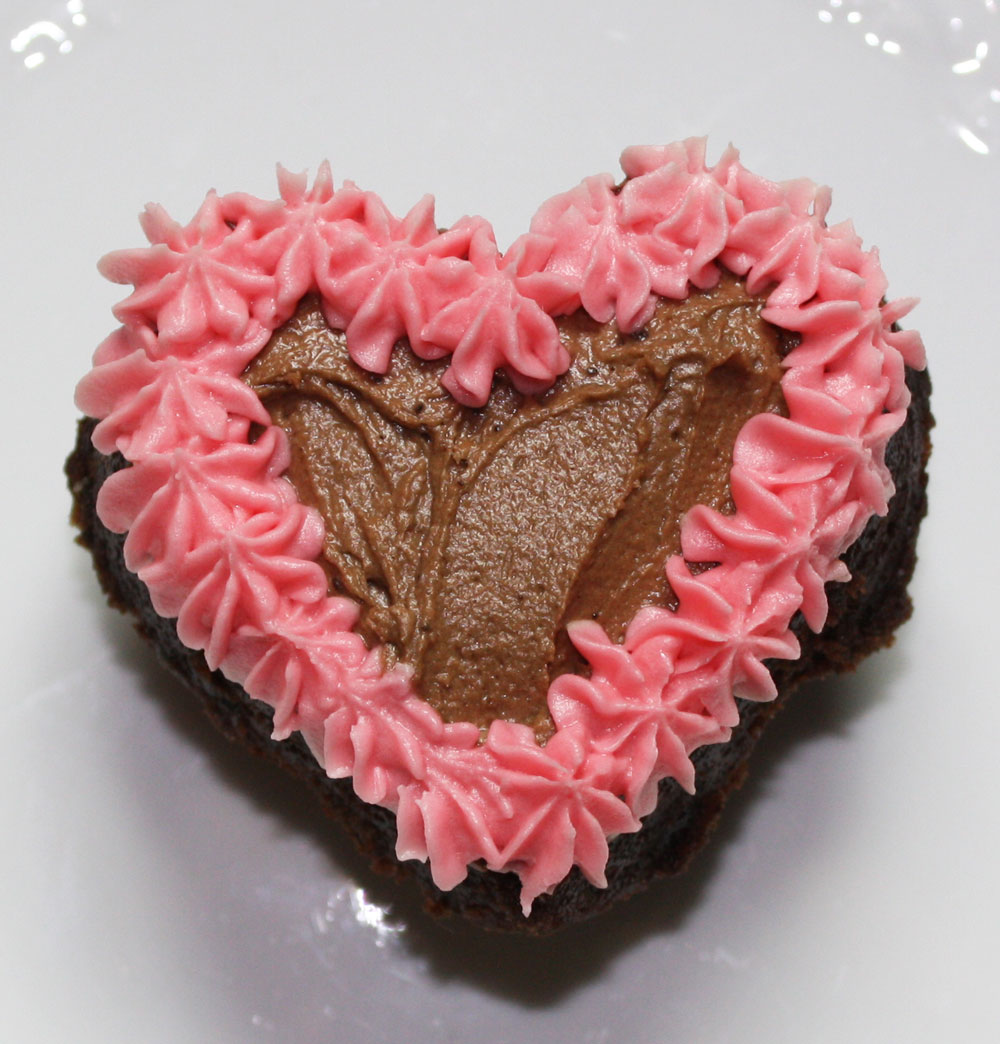
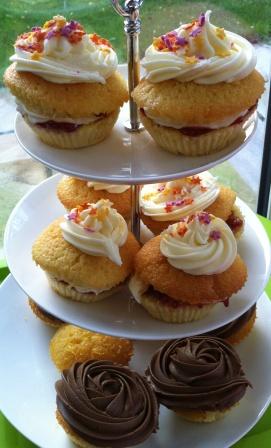
These chocolate Valentine cakes are filled with heavenly chocolate buttercream.
If that wasn’t wonderful enough they are covered in more delectable chocolate buttercream before being piped with pink buttercream around the edge of each cake.
Buttercream ingredients
7 oz (200g) of icing (confectioners) sugar, sieved
1 ¾ oz (50g) of softened butter (or dairy and lactose free vegetable spreadDF)
½ oz (15g) cocoa powder, sieved
Pink (or red) food colouring
Buttercream instructions
Add the sieved icing sugar to the softened butter (or vegetable spreadDF) a little at a time until all the icing sugar has been added and it is thoroughly mixed**.
Put ¾ of the mixture into a separate bowl and make the chocolate buttercream by adding the sieved cocoa powder and mixing well**.
Add pink (or red) food colouring to the remaining ¼ of the buttercream and mix well**.
**If the consistency is too thick you can loosen it by adding a little milk or waterDF. You will probably have to do this for the buttercream you will be piping.
Decorating instructions
Place the pink buttercream into a piping bag with a small rose shaped nozzle. Pipe roses around the edge of each cake as shown.
Valentine sponge cake decorating design
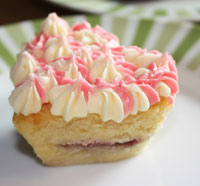
These delicious cakes are filled with raspberry jam.
Then prettily decorated with rich buttercream.
Buttercream ingredients
7 oz (200g) of icing (confectioners) sugar, sieved
1 ¾ oz (50g) of softened butter (or dairy and lactose free vegetable spreadDF)
Pink (or red) food colouring
Buttercream instructions
Add the sieved icing sugar to the softened butter (or vegetable spreadDF) a little at a time until all the icing sugar has been added and it is thoroughly mixed**.
Put ½ of the mixture into a separate bowl, add pink (or red) food colouring and mix well**.
**If the consistency is too thick you can loosen it by adding a little milk or waterDF. You will probably have to do this for the buttercream you will be piping.
Decorating instructions
For the cakes shown in the photo we used a special piping nozzle that allows you to mix the two colours as you form the shapes. You can achieve an equally romantic effect using two piping bags.
Lemon drizzle cake decorating design
These are the easiest cakes to decorate and are definitely the ones to chose if your loved one loves lemons.
Also if they are not great fans of icing.
Drizzle topping ingredients
2 Lemons - rind and juice
3 1/2 oz (100g) caster sugar
3 1/2 fl oz (100ml) cold water
Drizzle topping instructions
Ideally the drizzle topping should be ready at the same time the cake(s) come out of the oven so you can add the drizzle when they are still hot.
Put all ingredients for the drizzle topping in a pan over a low heat.
Dissolve the sugar, stirring frequently and watching to make sure it does not overheat.
Once the sugar has dissolved bring to the boil and simmer vigorously until it has reduced by half in quantity and has a syrupy consistency.
Decorating instructions
Ideally immediately the cake comes out of the oven and are still hot, insert a cake tester or small knife gently into the top of each cake a number of times.
Using a spoon, pour a little of the drizzle across the surface of each cake until it is all used up.
Leave your cakes to cool before removing from the baking tray.
I hope you have found these Valentine cake ideas useful. Please do post any comments below.
Happy Valentines!
Janne
Connect with me…..
Instagram @how2bglutenfree
Lots of delicious recipes to try


Welcome!
I'm Janne. I create recipes and provide tips for enjoying fantastic food that just happens to be gluten free.
Whether you are living gluten free full-time, trying it out or cooking occasionally for family and friends.
This is gluten free for foodies.
Never miss a recipe!
Subscribe to my FREE Newsletter!







New! Comments
Have your say about what you just read! Leave us a comment in the box below.